- Knowledge Base
- Transpoco Locate
-
Logging-in to your Transpoco account
-
How to organise your account to achieve the best results
-
How to use each feature - step by step guides
-
How to Order More Trackers
-
Live Map
-
Cameras
-
Webinar Videos
-
Walkaround Checklists
-
Reports
-
Fuel
-
Dashboard
-
Maintain Module
-
Driving Style
-
Locations
-
Cost Management (TCO) Report
-
The Notification Features
-
Hardware and Installation
-
Removal & Repair of Hardware
-
Cameras & GDPR Guidelines
-
Scheduled Reports
-
Safety Program
-
Fleet Manager App
-
Users & Permissions
-
Alerts
-
Policies & Documents
-
Privacy Policy and Terms & Conditions
-
API
-
Transpoco User Manuals
-
Settings
-
Whats New?
-
Account Mangement Services
-
Driver ID process
-
Security
-
Transpoco Locate
-
Subscriptions & Invoices
-
Tutorial videos
-
Cancelling your account
-
VOR
Transpoco Locate: How do I upload a photo of a vehicle to the database?
How to upload a photo of a vehicle to the vehicle's details in Transpoco Locate
Click on your name in the top right of the screen and select ‘Settings’ from the drop-down menu.
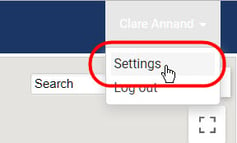
The settings menu will open.
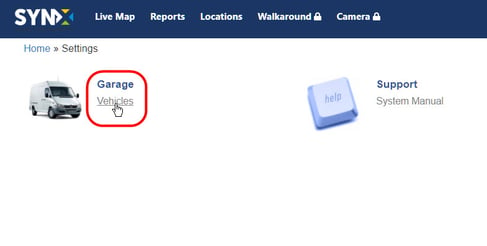
Click on Vehicles and the list of vehicles and their details will open.
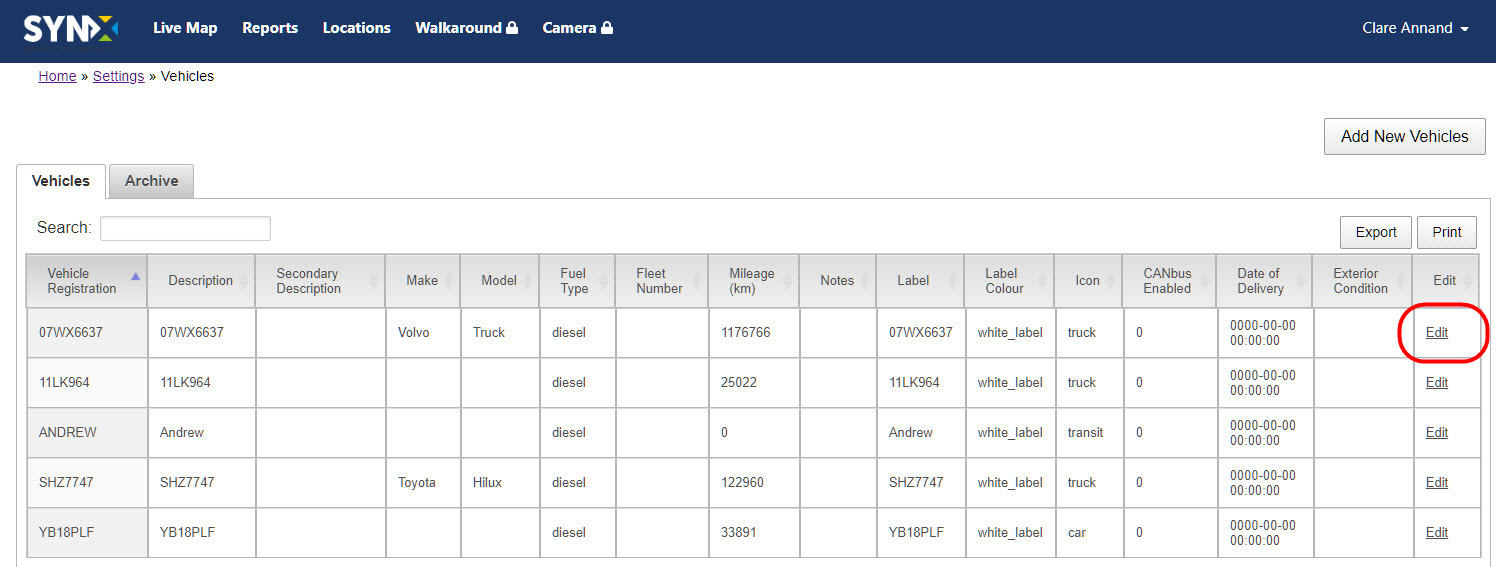
Click on Edit at the end of the row.
Click in the box for Click to Update Photo.
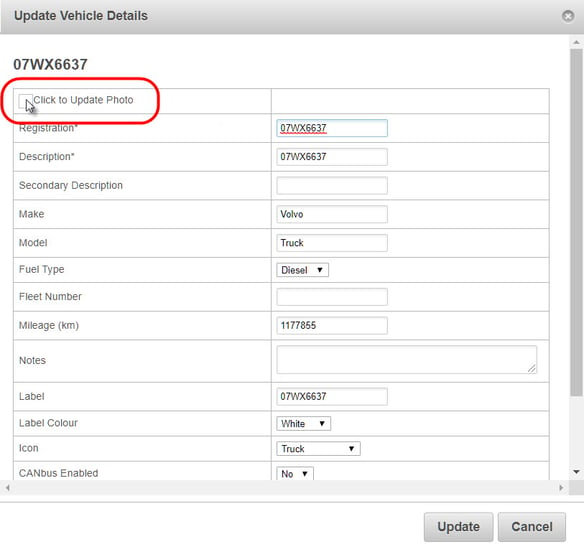
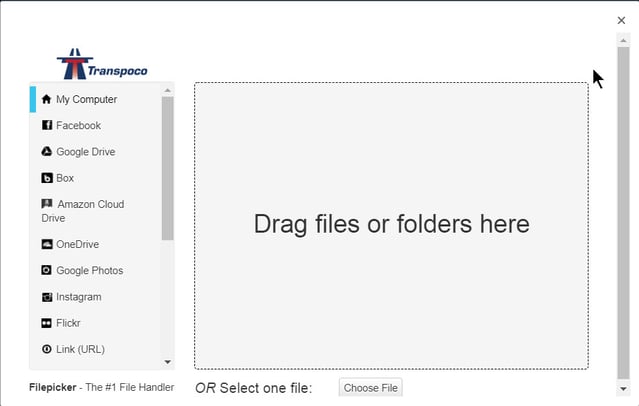
To add an image, either select My Computer and click on Choose File (default).
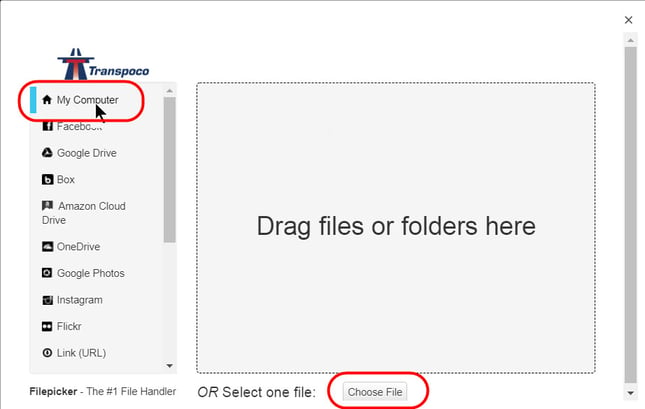
Alternatively, click on a different source from the filepicker list on the left, or drag the image file from your system to the box on the right.
For example, to add from Google Drive, click on Google Drive.
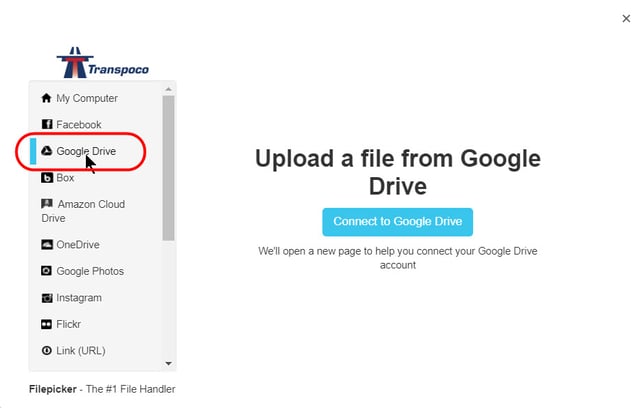
Click on Connect to Google Drive.

Click on the account name.

Click on Allow.
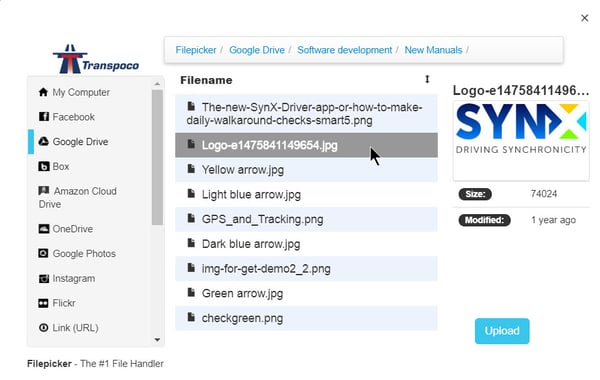
Select the image from the folders and files and click on Upload.
The image is added to the vehicle details.
Note: The image will appear in the list of vehicles if the column for photos has been enabled.
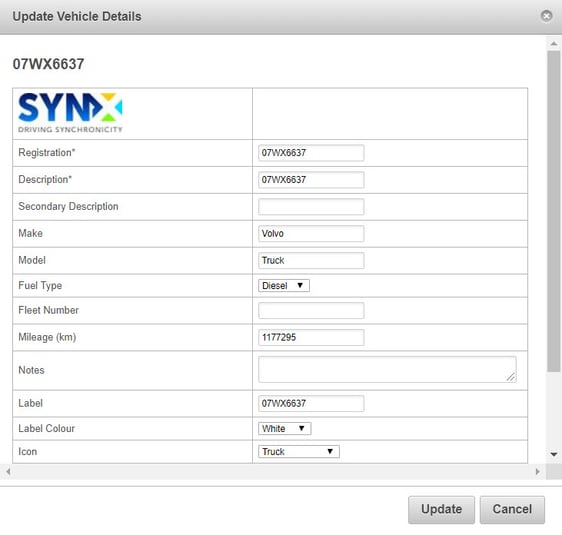
When all changes have been made, click on Update.
To change the image, click on the image in the Update Vehicle Details window and repeat the steps above.
