You can generate a schedule report with the notifications of your fleet in your Synx account. Please view the instructions below:
- Log in to your account.
- Click Services > Analytics > Schedule Reports.
3. Then click “+ New Schedule Report ".
4. Then add a subject and a description to this report.

5. Then choose either filter it by the vehicle groups / vehicles or filter by the driver groups / drivers.
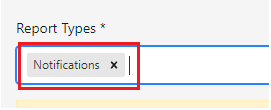
6. Then, select the “Notifications” type in the "Report Types" box.

7. Click on the “Next” button.
8. Then, choose the schedule period, schedule time, file format, report language, time zone and distance unit in the Configuration tab.
Note: There is a “Notifications categories” drop-down menu for this "Notifications" report, where you can select the Category to bring notifications from Camera and/or Tracker.
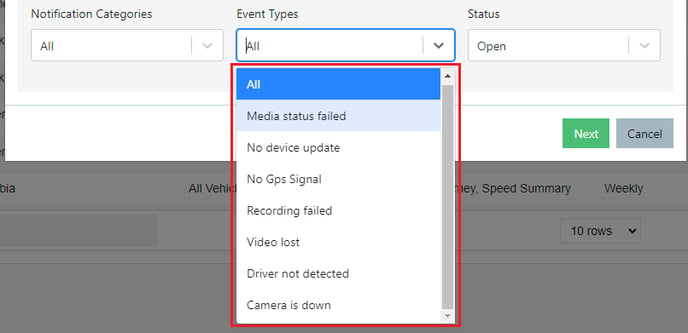
 There is an "Event Types" drop-down menu, where you can select the event types you want to filter this scheduled report by.
  Here is the definition for each event type:
| Event Type | Unit type | Definition |
|
Media status failed |
Camera | When the SD card in the camera has failed. There are many possibilities here. e.g.:
|
|
No device update |
Tracker |
When the tracker unit stops sending updates over 7 days |
|
No GPS Signal |
Tracker | When the tracker is update with GPS Signal is with less than 5 Satellites for more than 14 days |
| Recording failed | Camera (VisionTrack) | When there is a video request that could not be retrieved |
| Video lost | Camera | When the camera connection is not stable. It always happens when the ip settings are wrong on IP Camera, or the camera has hardware connection issue. |
| Driver not detected | Camera | We check one image per day to see if we can detect a person's face in the image. If there is no face detected we trigger the notification. |
| Camera down | Camera | When the camera stops sending updates for over 12h and the vehicle has been driven over 10km |

9. Click on the “Next” button.
10. Then, choose the person who will receive this schedule report and who can manage it.
Note: You can also add more users later when editing this Scheduled Report.
11. Then, click on the “Confirm” option
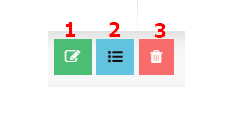
12. For editing / viewing of all reports already generated / deleting the Scheduled Report created, please click on the respective button.

- Button to Edit
- Button to see the schedule reports history
- Button to Delete the related schedule report
