- Knowledge Base
- Fleet Manager App
-
Logging-in to your Transpoco account
-
How to organise your account to achieve the best results
-
How to use each feature - step by step guides
-
How to Order More Trackers
-
Live Map
-
Cameras
-
Webinar Videos
-
Walkaround Checklists
-
Reports
-
Fuel
-
Dashboard
-
Maintain Module
-
Driving Style
-
Locations
-
Cost Management (TCO) Report
-
The Notification Features
-
Hardware and Installation
-
Removal & Repair of Hardware
-
Cameras & GDPR Guidelines
-
Scheduled Reports
-
Safety Program
-
Fleet Manager App
-
Users & Permissions
-
Alerts
-
Policies & Documents
-
Privacy Policy and Terms & Conditions
-
API
-
Transpoco User Manuals
-
Settings
-
Whats New?
-
Account Mangement Services
-
Driver ID process
-
Security
-
Transpoco Locate
-
Subscriptions & Invoices
-
Tutorial videos
-
Cancelling your account
-
VOR
How do I view journeys in the App?
How to view the Journeys Report in the SynX Fleet Manager App and view journeys on a map
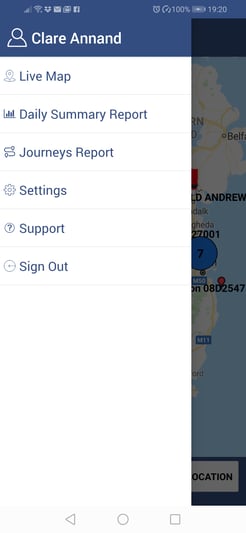
- Tap on the three horizontal lines at the top left of the screen to access the drop-down menu.
- Select Journeys Report to view the report. The default is for the current date and all vehicles (scroll down to view all the entries).
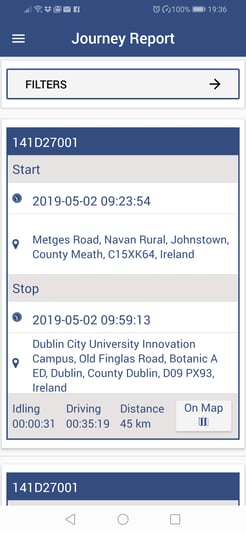
To view an individual journey on the map, tap on On Map. The blue pin denotes the start of the journey, and the blue flag denotes the end.
To replay the journey, tap the arrow under the map. The green pin will follow the route simultaneously with the timeline bar under the map and the time, speed and location changing to reflect the location on the route.
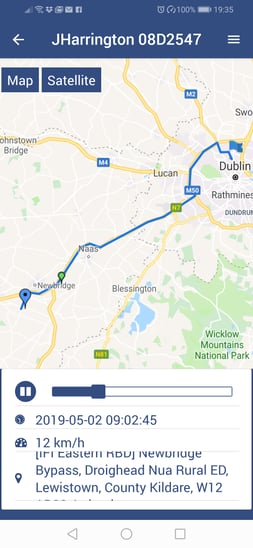
To return to the table view, tap the back arrow in the top left of the screen.
From the table view, tap on Filters to select a vehicle group and/or vehicle or to change the date.
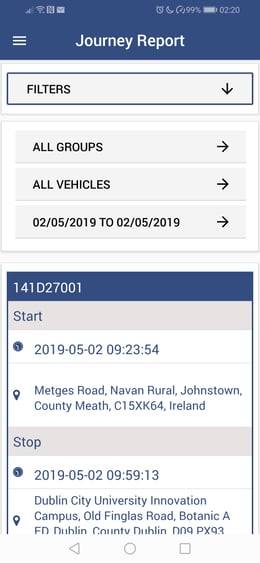
If required, tap on All Groups and select a vehicle group from the list, and/or tap on All Vehicles and select just one vehicle from the list.
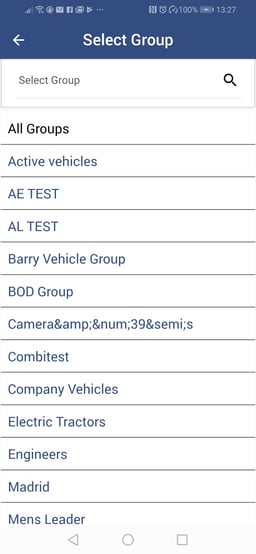
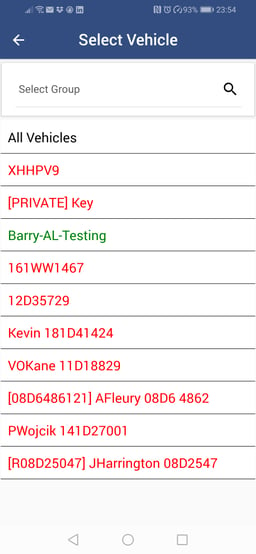
Note: In the list of vehicles, red vehicles currently have their engine off and green have their engine on.
If required, change from the current date to a previous date by tapping on Date and selecting the required date from the calendar. Note: the current date is green and the selected date is grey.
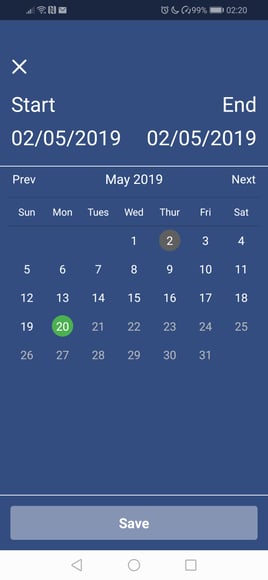
Tap on Save.
